In today’s digital age, images are significant in our online experiences. But have you ever wondered how websites fetch and display those images so effortlessly? It’s all thanks to APIs (Application Programming Interfaces) and a little bit of JavaScript magic! In this exciting journey, we’ll explore the world of images and learn how to create our custom image search engine. Moreover, we will use Zenserp Google image API. You will also learn about the features of this Image Search API.
Imagine searching for any image you can think of and displaying it on your design webpage. Sounds cool, right? We’ll use a powerful tool called the Zenserp Image API. It allows us to fetch image search results programmatically. Don’t worry if the name sounds technical – we’ll break it down step by step. We’ll also use JavaScript, a popular and beginner-friendly programming language, to bring our image search engine to life.
Moreover, you’ll not only have a better understanding of how websites work behind the scenes, but you’ll also have the skills to create your own unique image search feature. Let’s begin.

Table of Contents
What Is Google Image Search API?
The Google Image Search API is a tool that allows developers to programmatically access and retrieve image search results from Google’s vast image database. Developers can integrate image search functionality into their applications, websites, or projects through this API. Hence, enhancing user experiences with visual content.
Zenserp Image Search API
The Zenserp API is a powerful tool that helps you gather information from search engine result pages without any interruptions. One cool thing it can do is use the Google Image Search API, which lets you get pictures from Google’s image search in real time. You use similar settings when you do a normal Google search. However, you must include a special phrase and a code for an image search.
Also, the Zenserp image search API is useful for putting together collections of pictures to teach computer programs how to learn things. Many options let you choose the exact kind of pictures you want.
Regarding how much it costs, Zenserp has a free plan that lets you make 50 requests every month. If you need more requests, there are other choices. For example, you could pay $29.99 to get 5,000 requests or $379.99 to get 100,000 requests monthly.
Why Should You Choose JavaScript To Integrate Zenserp Image Search API?
Choosing JavaScript to integrate the Zenserp Image Search API brings simplicity and interactivity to your web projects.
JavaScript is a beginner-friendly language commonly used for website magic, making things move and respond.
With JavaScript, you can easily fetch and show images from Zenserp’s API on your webpage, creating a custom image search tool.
Its friendly nature and wide use in creating cool features like animations and forms make it a great choice.
So, if you’re keen to craft a personalized image search experience and add a touch of web wizardry, JavaScript is the way to go!

How To Integrate Zenserp Image Search API in JavaScript?
First, get an API key from the Zenserp website.

Next, create a directory using the command prompt.
Open the directory in Visual Studio Code and create an HTML file. We will write the HTML and JavaScript code in the same file.
Let’s begin writing our code.
Step 1: Document Setup and Styling
<!DOCTYPE html>

<html lang="en">

<head>

  <meta charset="UTF-8">

  <meta name="viewport" content="width=device-width, initial-scale=1.0">

  <title>Zenserp Google Image Search</title>

  <style>

    /* CSS styles for the page layout and appearance */

  </style>

</head>

<body>

```
This section sets up the basic structure of an HTML document. The `<meta>` tags specify the character set and viewport settings. Next, the `<title>` tag sets the page title. Then, the `<style>` tag is used for adding CSS styles that define the page’s layout and appearance.
Step 2: Page Styling
  <style>

    body {

      font-family: Arial, sans-serif;

      background-image: url('https://images.pexels.com/photos/259915/pexels-photo-259915.jpeg?auto=compress&cs=tinysrgb&w=1260&h=750&dpr=1');

      background-size: cover;

      margin: 0;

      padding: 0;

      background-color: #f8f8f8;

    }

    /* Other CSS styles for the header, search container, and image results */

  </style>

</head>

<body>
It defines CSS styles to control the layout and appearance of the page. Then, it styles the `<body>` element with a background image, font family, and background color. Furthermore, it sets the margin and padding to 0 to eliminate extra spacing around the page. Then, it defines styles for `.header`, `.search-container`, and `.result-image` elements.
Step 3: Main Heading
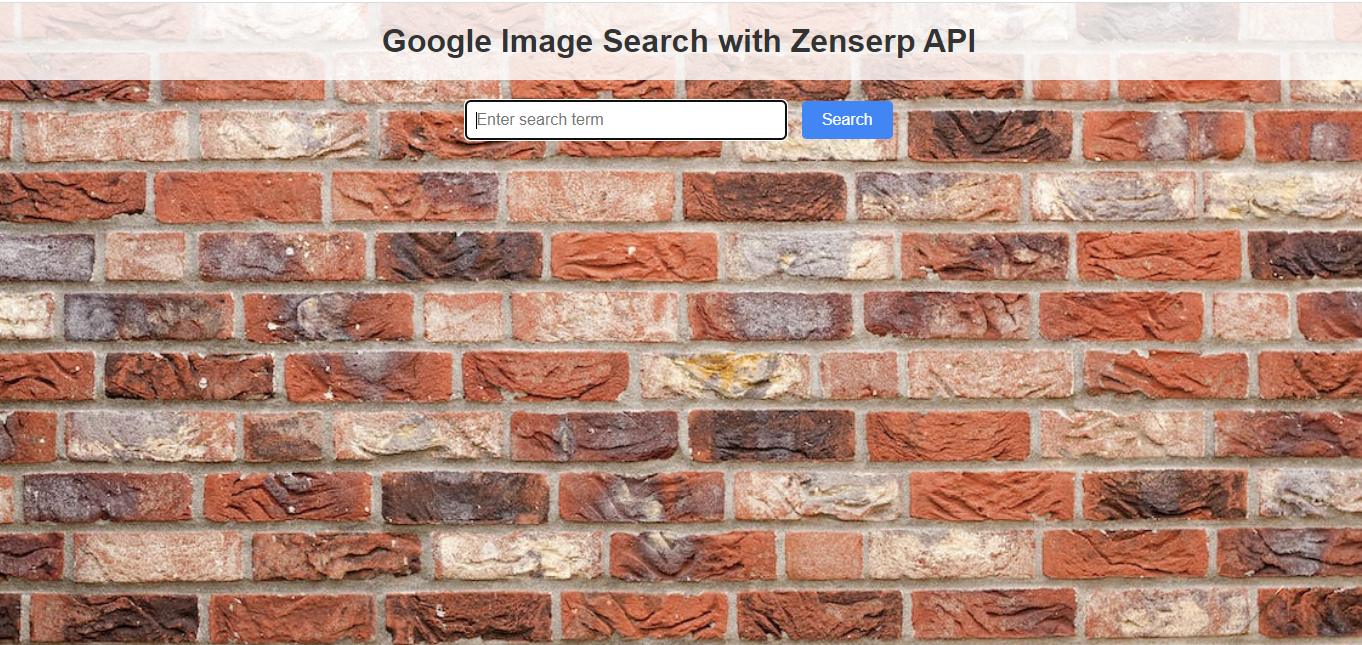
  <div class="header">

    <h1>Google Image Search with Zenserp API</h1>

  </div>
It creates a `<div>` element with the class `header` to contain the main heading. Inside the `<div>`, there’s an `<h1>` element displaying the main heading text.
Step 4: Search Input and Button
  <div class="search-container">

    <input type="text" id="searchTerm" placeholder="Enter search term">

    <button id="searchButton">Search</button>

  </div>
It creates a `<div>` element with the class `search-container` to contain the search input and button. Then, it includes an `<input>` element with the type “text” and an ID of `searchTerm` for entering search terms. Moreover, it adds a `<button>` element with the ID `searchButton` to initiate the search.
Step 5: Image Results Container
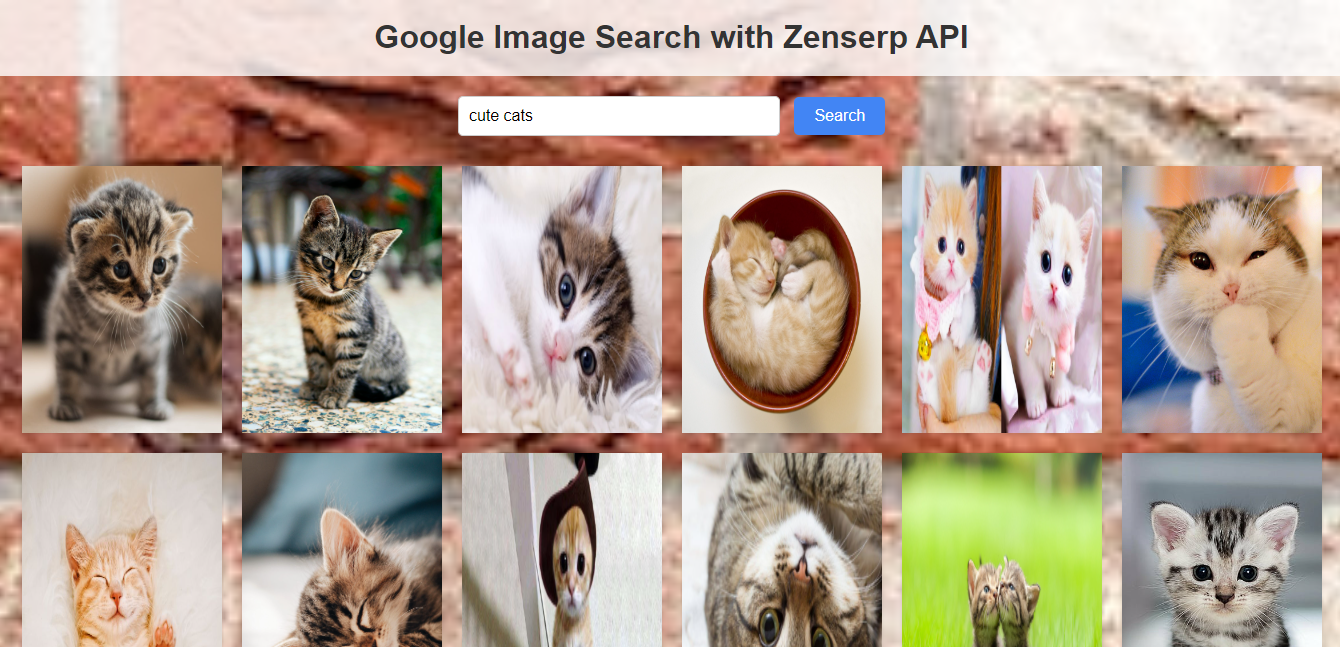
<div id="imageResults"></div>It creates an empty `<div>` element with the ID `imageResults` to hold fetched image results from the API.

JavaScript Code
  <script>

    document.addEventListener('DOMContentLoaded', function () {

      const apiKey = 'YOURAPIKEY';

      const searchButton = document.getElementById('searchButton');

      const searchTermInput = document.getElementById('searchTerm');

      const imageResultsDiv = document.getElementById('imageResults');

```
`document.addEventListener(‘DOMContentLoaded’, function () { … });` ensures that the JavaScript code runs after the page’s content is fully loaded. Then, the `const apiKey = ‘YOURAPIKEY’;` replaces `’YOURAPIKEY’` with your actual Zenserp API key. Next, `const searchButton = document.getElementById(‘searchButton’);` retrieves a reference to the search button element using its ID.
The `const searchTermInput = document.getElementById(‘searchTerm’);` retrieves a reference to the search input field element using its ID. Next, `const imageResultsDiv = document.getElementById(‘imageResults’);` retrieves a reference to the image results container element using its ID.
JavaScript Code (Continue…)
      searchButton.addEventListener('click', function () {

        const searchTerm = searchTermInput.value;

        if (searchTerm) {

          const apiUrl = `https://app.zenserp.com/api/v2/search?apikey=${apiKey}&q=${searchTerm}&tbm=isch`;

          fetch(apiUrl)

            .then(response => response.json())

            .then(data => {

              const imageResults = data.image_results;

              if (imageResults && imageResults.length > 0) {

                imageResultsDiv.innerHTML = '';

                imageResults.forEach(image => {

                  const imgElement = document.createElement('img');

                  imgElement.src = image.sourceUrl;

                  imgElement.alt = 'Image';

                  imgElement.classList.add('result-image');

                  imageResultsDiv.appendChild(imgElement);

                });

              } else {

                imageResultsDiv.innerHTML = 'No results found.';

              }

            })

            .catch(error => {

              console.error('Error:', error);

            });

        }

      });

    });

  </script>

</body>

</html>
`searchButton.addEventListener(‘click’, function () { … });` adds a click event listener to the search button. When the button is clicked, the provided function is executed.
Inside the click event listener:
- Retrieves the user’s search term from the input field.
- Constructs the API URL using the search term and API key.
- Uses the `fetch()` function to send a request to the Zenserp API and retrieve image search results in JSON format.
- Processes the API response: If images are found, it creates `<img>` elements for each image and appends them to the `imageResultsDiv`. If no images are found, it displays a “No results found.” message.
- `.catch(error => { console.error(‘Error:’, error); });`: If any errors occur during the API request or processing, they are caught and logged to the console.

Final Code & Output
<!DOCTYPE html>
<html lang="en">
<head>
  <meta charset="UTF-8">
  <meta name="viewport" content="width=device-width, initial-scale=1.0">
  <title>Zenserp Google Image Search</title>
  <style>
    body {
      font-family: Arial, sans-serif;
      background-image: url('https://images.pexels.com/photos/259915/pexels-photo-259915.jpeg?auto=compress&cs=tinysrgb&w=1260&h=750&dpr=1');
      background-size: cover;
      margin: 0;
      padding: 0;
      background-color: #f8f8f8;
    }

    .header {
      background-color: rgba(255, 255, 255, 0.8);
      padding: 20px;
      text-align: center;
    }

    h1 {
      margin: 0;
      color: #333;
    }

    .search-container {
      text-align: center;
      margin-top: 20px;
    }

    #searchTerm {
      padding: 10px;
      font-size: 16px;
      border: 1px solid #ccc;
      border-radius: 5px;
      width: 300px;
      margin-right: 10px;
    }

    #searchButton {
      padding: 10px 20px;
      font-size: 16px;
      background-color: #4285f4;
      color: #fff;
      border: none;
      border-radius: 5px;
      cursor: pointer;
    }

    #searchButton:hover {
      background-color: #357ae8;
    }

    #imageResults {
      display: flex;
      flex-wrap: wrap;
      justify-content: center;
      margin-top: 20px;
    }

    .result-image {
      width: 200px;
      height: auto;
      margin: 10px;
      box-shadow: 0 2px 4px rgba(0, 0, 0, 0.1);
      transition: transform 0.2s;
      cursor: pointer;
    }

    .result-image:hover {
      transform: scale(1.05);
    }
  </style>
</head>
<body>
  <div class="header">
    <h1>Google Image Search with Zenserp API</h1>
  </div>
  <div class="search-container">
    <input type="text" id="searchTerm" placeholder="Enter search term">
    <button id="searchButton">Search</button>
  </div>
  <div id="imageResults"></div>

  <script>
    document.addEventListener('DOMContentLoaded', function () {
      const apiKey = 'YOURAPIKEY';
      const searchButton = document.getElementById('searchButton');
      const searchTermInput = document.getElementById('searchTerm');
      const imageResultsDiv = document.getElementById('imageResults');

      searchButton.addEventListener('click', function () {
        const searchTerm = searchTermInput.value;
        if (searchTerm) {
          const apiUrl = `https://app.zenserp.com/api/v2/search?apikey=${apiKey}&q=${searchTerm}&tbm=isch`;

          fetch(apiUrl)
            .then(response => response.json())
            .then(data => {
              const imageResults = data.image_results;
              if (imageResults && imageResults.length > 0) {
                imageResultsDiv.innerHTML = '';

                imageResults.forEach(image => {
                  const imgElement = document.createElement('img');
                  imgElement.src = image.sourceUrl;
                  imgElement.alt = 'Image';
                  imgElement.classList.add('result-image');

                  imageResultsDiv.appendChild(imgElement);
                });
              } else {
                imageResultsDiv.innerHTML = 'No results found.';
              }
            })
            .catch(error => {
              console.error('Error:', error);
            });
        }
      });
    });
  </script>
</body>
</html>
Conclusion
Integrating a Google Image Search API with JavaScript empowers developers to create dynamic image search experiences within their web applications. Users can seamlessly search and display relevant images by leveraging the API’s capabilities. Hence, enhancing user engagement and enriching content. This integration highlights the versatile potential of JavaScript in modern web development.
FAQs
Is There an API for Google Image Search?
Yes, Google provides a Custom Search JSON API that allows programmatic access to their image search functionality. Also, you can use the alternative options like Zenserp Google Image Search API.
How Do I Use Google Images API?
To use Google Images API, obtain an API key, make HTTP requests, and process responses to fetch and display images programmatically.
Is There a Free Google Search API?
Yes, Google offers a Custom Search JSON API, which allows limited free usage for custom search functionality in applications.
Is Bing Image Search API Free?
No, the Bing Image Search API is not free and typically requires a subscription or payment for usage.
Unlock Enhanced Search Experiences with Zenserp! Try Now and Elevate Your Data Retrieval Efforts.